



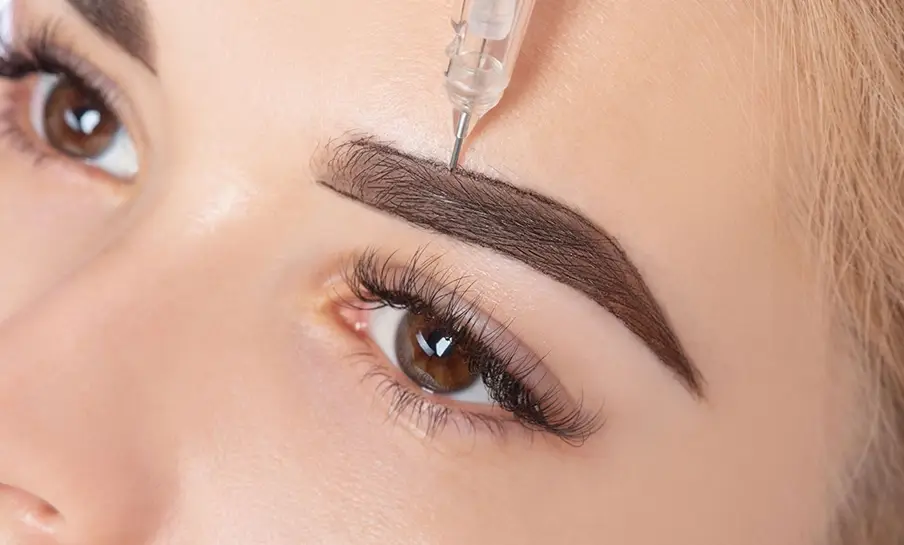
Microblading can help your brows look fuller and more even. So, if you feel tired of filling them in, you are not alone. Still, good results do not happen by luck. They come from smart choices before, during, and after your visit. Also, you should know what to ask, because it is your face. At Angie’s Threading Salon, we work with brows every day. We also offer waxing and skin care, so we see many skin types. That is why we like simple plans that work. In this blog, I will share seven tips that help you get clean, natural brows. Then, you can book with more confidence.
Micro Blading Safety and Clean Setup Checklist
First, put safety at the top of your list. Microblading makes tiny cuts in the skin. So, clean tools and clean hands matter a lot. Also, your artist should use new, single-use blades each time. They should open the pack in front of you. Next, they should wear fresh gloves and clean the work area. If you do not see these steps, speak up. You can also check how they handle skin cleaning before they start. A proper wipe-down lowers the chance of germs. Even small details matter, like using a covered tray for tools.
Quick safety checklist:
- Ask if the blade is single-use and sealed.
- Check that gloves go on before skin contact.
- Look for a clean station with wiped surfaces.
- Ask how they throw away sharp tools.
Also, read recent reviews before you book. In fact, BrightLocal found that only 4% of people say they never read online reviews. So, reviews can help you spot patterns fast.
Micro Blading Brow Mapping For Perfect Symmetry
Next, talk about the shape before anyone picks up the tool. Brow mapping is the step where the artist draws your brow plan first. Then, they measure key points on your face. This helps your brows look balanced in real life. Also, it helps avoid a sharp arch or a long tail you did not want. When you approve the outline, you stay in control. So, do not rush this part.
What mapping usually checks:
- Where your brow should start near your nose
- Where the highest point should sit
- Where the tail should end near your outer eye
Also, bring a clear photo of your usual brow makeup. That helps you explain your goal. Then, ask the artist to keep the front of the brow soft. A soft front often looks more natural. Finally, take a photo of the mapped shape before the work begins. So, you can compare both sides and ask for changes.
Micro Blading Color That Matches Your Skin Tone
Now, let’s talk color, because it can change how “real” your brows look. Many people pick a shade that is too dark. Then, the brows can heal heavy or gray. Instead, match pigment to your skin tone and your brow hair. Also, match it to your undertone, which can be warm, cool, or neutral. A trained artist will help you choose a safe shade. Still, you should ask to see the pigment options.
Simple color tips that help:
- Pick one to two shades lighter than your hair for softer results.
- Avoid pitch-black pigment for brows in most cases.
- Ask how the color may fade on your skin type.
Also, oily skin can fade faster. So, you may need a touch-up sooner. Next, ask if the pigment is made for cosmetic brow work. That matters because brow pigments are meant to heal more softly than body tattoo ink. Vogue notes microblading places pigment in the upper skin layers and can last one to three years. So, shade choice should focus on long-term wear.
Schedule Micro Blading Around Your Skin Routine
Before your visit, your skin should feel calm. So, avoid anything that makes it red or dry. For example, strong face acids and retinol can make skin sensitive. Then, the skin may heal unevenly. Also, do not plan microblading right before a big event. You may flake during healing, and that is normal. So, give yourself time.
Good planning steps:
- Stop retinol near brows for about 1–2 weeks if your provider agrees.
- Avoid strong peels or scrubs near the brow area.
- Skip brow waxing right before microblading.
- Tell your artist about any skin issues or meds.
Also, arrive with clean skin and no brow makeup. That saves time and helps the artist see your natural brow line. Then, eat a small meal before you go. That can help you feel steady. Finally, think about timing. Many people book a touch-up around 4–6 weeks after the first visit. So, plan both visits early.
Micro Blading Technique Basics For Natural Strokes
During the session, the “how” matters as much as the “what.” Microblading uses a hand tool with tiny needles in a row. Then, the artist makes fine strokes that look like hair. But the strokes must go at the right depth. If they go too deep, pigment can spread and look blurry later. If they stay too shallow, the color can fade fast. So, steady pressure matters.
What good technique often includes:
- Strokes that follow your natural hair growth
- Small sections done slowly, not rushed
- Gentle wiping that does not scrape the skin
- Frequent checks for balance on both sides
Also, ask about numbing cream and how long the session takes. Vogue reports that many sessions take about two to three hours. So, the artist needs time to work carefully. Then, speak up if something feels sharply painful. Some discomfort is normal, but it should not feel extreme.
Micro Blading Aftercare Steps For Smooth Healing
Aftercare is where many people slip, so keep it simple. First, do not pick scabs or flakes. Even if they itch, leave them alone. Otherwise, you can pull out pigment and leave gaps. Next, keep brows clean as your artist instructs. Also, use only the balm or ointment they recommend. Too much product can soften scabs and slow healing.
Common aftercare rules:
- Keep water off brows at first, if told to do so.
- Avoid sweating, steam, and swimming during healing.
- Do not put makeup on the brow area while it heals.
- Skip acids and retinol near brows until healed.
Healing often takes about four to six weeks. So, do not judge your final color too soon. At first, brows can look darker. Then, they may look lighter or patchy. Still, color often returns as skin settles. So, stay patient and follow the plan.
Protect Micro Blading Results With Touch Ups
Finally, think long-term, because brows fade over time. So, plan a touch-up if your artist suggests it. A touch-up helps fill spots that healed light. It also helps adjust color if needed. Then, your brows can look more even. Also, protect healed brows from the sun. UV light can fade pigment faster. So, use sunscreen once the skin is fully healed.
Easy ways to help brows last:
- Use SPF on brows after healing.
- Avoid strong scrubs over the brow area.
- Tell your skin care pro you have microblading.
Also, look for artists who communicate well. That matters before and after your visit. BrightLocal found 88% of people would use a business that replies to all reviews. So, check if the salon answers questions and responds to feedback. Then, you can feel more sure about your choice.
Conclusion Microblading can look clean and natural when you plan it well. First, choose safety and a clean setup. Next, approve mapping and color choices early. Then, follow aftercare with care for several weeks. Also, protect your brows with sun care and touch-ups. If you want help with brow shape before microblading, we can help. Angie’s Threading Salon offers eyebrow services, waxing, and skin care. So, call or visit Angie’s Threading Salon today and book your brow appointment. We will help you feel ready and informed.